ANGULARJS & SLIM MICROFRAMEWORK DEVELOPING A REST-POWERED AJAX TABLE CONTROL (PART 3)
Welcome to the third part of a hands-on tutorial on writing reusable user interface components with AngularJS. In this tutorial, we’ll write a table control that asynchronously loads data from a server, display it, and allows the user to sort the data by clicking table headers. The sorting is done client-side. We’ll show how to write a REST-server in PHP, how to define custom HTML elements in AngularJS, and how to setup a controller for the elements. To top it off, we’ll write CSS for our table in such a way that it can be dropped into a user interface in a snap, and scales fluidly with the space allotted to it.
The third part of this tutorial adds CSS to style the output we already have, and adds automatic (client-side) sorting to our table control.
Don’t forget to read the first part and the second part of this tutorial.
Styling the output
In the previous part of this tutorial, we put it all together. We’ve defines directives in AngularJS that replace our <mytable> and <mytablecol> elements with custom HTML templates, retrieve data from our RESTful web services, and place that data in our template.
At this point, though, our output doesn’t look like much:
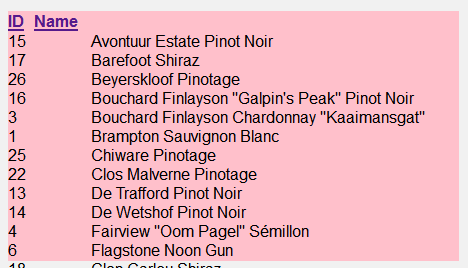
This is easily remedied. There’s absolutely no CSS in place yet, and adding some will do wonders. Our template HTML is:
<div class="mytable">
  <div class="header">
    <div class="header-inner">
      <table cellspacing="0" cellpadding="0">
        <thead>
          <tr>
            <th ng-repeat="col in cols" style="width:{{col.width}}">
              <a href="">{{col.title}}</a>
            </th>
          </tr>
        </thead>
      </table>
    </div>
  </div>
  <div class="body">
    <table cellspacing="0" cellpadding="0">
      <tbody>
        <tr ng-repeat="item in items">
          <td ng-repeat="col in cols" style="width:{{col.width}}">
            <div>
              {{item[col.field]}}
            </div>
          </td>
        </tr>
      </tbody>
    </table>
  </div>
  <span style="display:none" ng-transclude></span>
</div>
Note that we are in fact generating two tables. The first table contains the column headers, and the second table contains the actual data. This trick will allow us to fix the table header, while the table bottom actually scrolls. For large tables, this keeps the table headers visible at all times.
Writing the CSS to style this HTML is straightforward. The required classes are already in place, so we can just style those. While the CSS is available for download here, I’ll point out some particulars.
- The entire
<mytable>element should always fill up all the space available to it. Therefore, the template that replaces it should do so as well. This is why the.mytableCSS class has a width and height of 100%. - All paddings and margins for any element inside .mytable are set to zero. This is how this is done:
.mytable *
{
  padding: 0;
  margin: 0;
}- The
table-layoutfor both tables should be set to fixed. If you don’t to this, the column widths (expressed in percentages) may be changed and clipping and ellipsis won’t work correctly.
Time to look at the result!
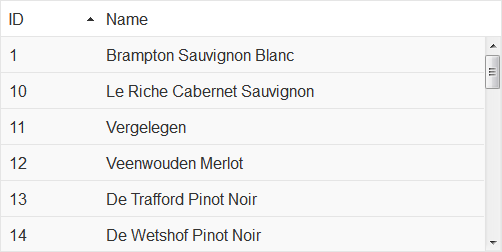
Wow! Much nicer now. The column widths in the header and body table are nicely lined up, and the body table can be scrolled. This way, we can load any amount of data and use only a limited amount of screen real estate.
Adding sorting
You may remember that we had added a defsort attribute to our mytablecol elements:
<mytable item="wine">
  <mytablecol title="ID" field="id" width="20%" defsort="up"></mytablecol>
  <mytablecol title="Name" field="name" width="80%" defsort="down"></mytablecol>
</mytable>
This attribute indicates whether our table can be sorted by a given column, and in which direction it should be sorted when sorting occurs. It’s time to add sorting to our AngularJS code and make this work.
Let’s add a sort method to our mytable directive controller:
$scope.sortData = function(field, dir)
{
  $scope.items.sort(function(a,b)
  {
    if(a[field] < b[field]) return (dir == "down" ? 1 : -1);
    if(a[field] > b[field]) return (dir == "down" ? -1 : 1);
    return 0;
  });
};
this.sortData = $scope.sortData;
This code sorts the $scope.items field using a custom sort function. It needs to know which field to sort by, and in which direction. This information is passed through method arguments.
A little bit of magic happens now. When this sort function is called, it clearly makes changes to the $scope.items array. AngularJS notices this and updates the user interface in the browser automatically. We don’t actually have to let AngularJS know that the data has changed! We’ll see this in action at the moment.
Having written a generic sort method which can sort by field and direction, we need somewhere to call it from. We’ll define another method, one that can be called from our template:
$scope.sortBy = function(col) {
  // If no default sort dir is given, we can't sort.
  if(col.defsort != "down" && col.defsort != "up") return;
  // Unsort all columns (except this one).
  this.cols.each(function(c) { if(c != col) c.sort = ""; });
  // Set sort to default column, or if already sorted, toggle sort dir.
  if(col.sort == "")
    col.sort = col.defsort;
  else
    col.sort = col.sort == "up" ? "down" : "up";
  // Sort the data by the column's field and current sort dir.
  this.sortData(col.field, col.sort);
};
This method can be hooked up to the header links in our template:
<a href="" ng-click="sortBy(col)"></a>When the links are clicked, the table is sorted (if the column clicked is actually sortable, according to the defsort attribute).
We are now ready. Refresh the page and check out the automatic sorting. The CSS makes sure that little sort arrows appear to indicate the sorting directions. Oh – you’ll need the arrows image! Here it is; save it off as PNG and place it with the CSS:

Summary
We’re all done. We’ve built a custom AJAX table powered by AngularJS, with a RESTful web service based on the Slim Microframework and the Idiorm/Paris ORM libraries.
Challenges
- Add a refresh button to the header bar that refreshes the data from the server.
- Add a search feature to the table control. It should be an input element that filters the table as characters are typed.